
Beautiful by Drew Furniture offers stylish, functional pieces designed for modern living. Created by Drew Barrymore, the collection emphasizes elegance, durability, and ease of assembly for a seamless experience.
1.1 Overview of the Beautiful by Drew Brand

Beautiful by Drew is a furniture brand that combines elegant design with durability, offering modern, functional pieces for everyday living. Founded by Drew Barrymore, the collection emphasizes high-quality materials and craftsmanship, ensuring each item is both stylish and long-lasting. The brand focuses on creating furniture that is easy to assemble while maintaining a sophisticated aesthetic, making it perfect for homeowners seeking to enhance their spaces with affordable, fashionable solutions.
1.2 Importance of Following the Assembly Manual
Following the assembly manual for Beautiful by Drew furniture is crucial for ensuring stability, functionality, and safety. Proper assembly prevents structural issues and enhances durability. The manual provides clear, step-by-step instructions to avoid common mistakes. Adhering to the guidelines ensures all components fit perfectly, maintaining the product’s quality and warranty. It also helps users identify potential hazards and take necessary precautions, making the assembly process efficient and stress-free.
Safety Precautions and Tools Needed
Wear protective gear, ensure a stable workspace, and use the correct tools as specified. Follow all safety guidelines in the manual to ensure a safe assembly process.
2.1 Essential Safety Guidelines
Always wear safety gloves and protective eyewear. Ensure the workspace is stable and clear of obstacles. Avoid distractions and follow the manual step-by-step. Handle heavy parts with care and use proper lifting techniques. Keep children and pets away. Verify all components and hardware are included before starting. Never assemble furniture on uneven surfaces or near open flames. Ensure good lighting and maintain a clean workspace to avoid accidents. Follow all safety instructions provided in the manual for a secure assembly process.
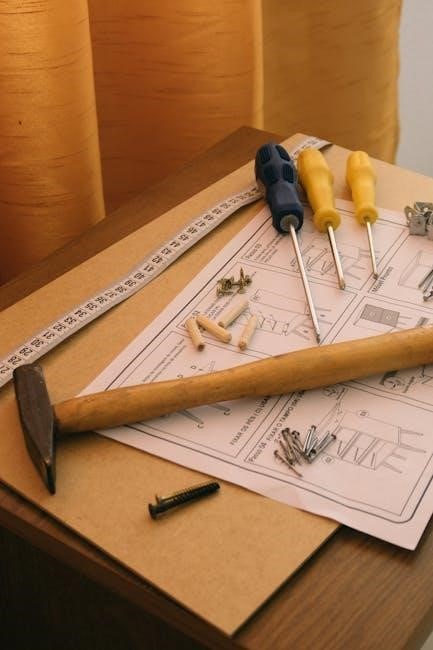
2.2 List of Required Tools
- An Allen wrench (provided in the hardware pack)
- A Phillips-head screwdriver
- A rubber mallet for tapping parts into place
- A measuring tape for accurate alignment
- A clamp or additional pair of hands for stability
- A marker or pencil for marking drill points
- Optional: Power drill for faster assembly
Ensure all tools are within reach to streamline the assembly process.
Unpacking and Inventory
Start by carefully unpacking all components, checking for damage or missing items. Organize hardware and parts to ensure everything is accounted for before assembly begins.
3.1 How to Unpack Furniture Safely
Begin by carefully laying down boxes on a soft, flat surface to prevent scratches or damage. Open each box slowly, using a utility knife or scissors to cut packing materials without cutting too deeply. Remove packaging materials gently to avoid touching or bending delicate components. Protect finishes by handling furniture pieces with clean, dry hands or soft cloths. Inspect each part for damage before setting it aside. This method ensures a safe and organized start to your assembly process.
3.2 Verifying All Components and Hardware
After unpacking, systematically check each component and hardware piece against the provided inventory list. Ensure all items, including screws, brackets, and panels, are accounted for and undamaged. Compare hardware types and quantities with the manual’s specifications. If any parts are missing or damaged, note the details and contact customer support immediately. This step is crucial to avoid delays and ensure a smooth assembly process. Organize items neatly for easy access during assembly.

Step-by-Step Assembly Instructions
Begin by preparing your workspace and organizing components. Follow the manual’s sequential guide to assemble the main structure, then attach drawers and doors securely. Ensure accuracy and tighten hardware properly for stability. Refer to diagrams for clarity, and proceed methodically to avoid errors. Double-check each step before moving forward to ensure a smooth and successful assembly process.
4.1 Preparing the Workspace
Clear a large, flat area for assembly, ensuring good lighting and ventilation. Cover the floor with a protective cloth to prevent damage. Gather all tools and hardware, organizing them by type for easy access. Refer to the manual’s component list to verify all parts are present. Arrange the instructions and diagrams within view. Ensure no obstacles are nearby to avoid tripping or misplacing items. A well-prepared workspace simplifies the assembly process and reduces the risk of errors or delays.
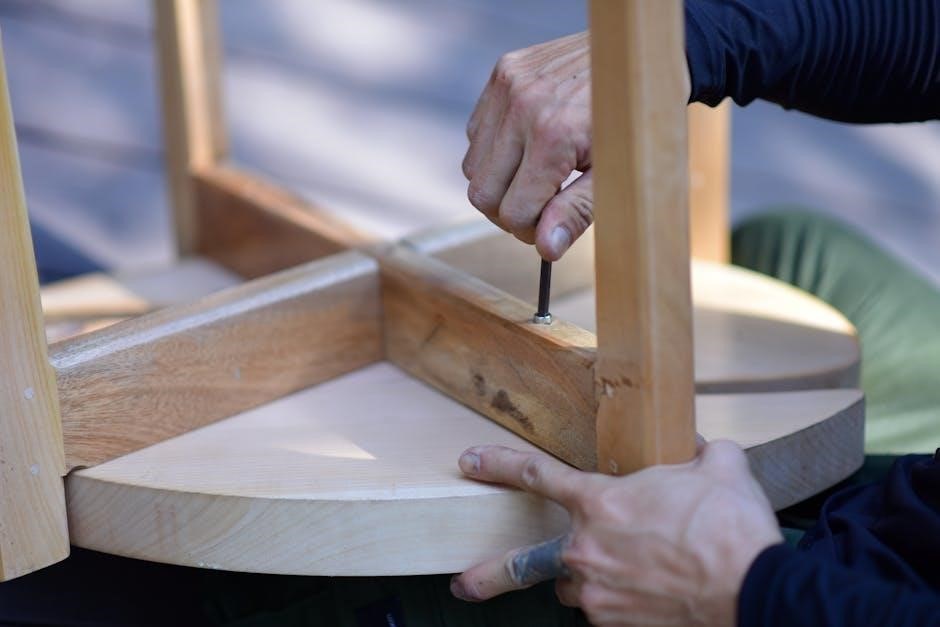
4.2 Assembling the Main Structure
Begin by assembling the main framework using the largest components, such as the base and side panels. Follow the manual’s diagrams to attach legs or frames securely. Use an Allen wrench to tighten bolts firmly, ensuring stability. Align pre-drilled holes carefully to avoid misfitting parts. Connect horizontal supports next, verifying each joint is flush and level. Double-check the manual for specific torque recommendations to prevent overtightening. A sturdy main structure is essential for the furniture’s overall stability and functionality.
4.3 Attaching Drawers and Doors
Once the main structure is assembled, attach the drawers and doors. Align drawer slides with pre-drilled holes and secure them using screws. Ensure proper alignment for smooth operation. For doors, attach hinges to the frame and align with door handles. Tighten all hardware firmly but avoid overtightening. Test drawer glides and door closures to ensure proper fit. If necessary, adjust hinges or slides for even alignment. Refer to the manual for specific torque settings to prevent damage to the finish or hardware.

Troubleshooting Common Issues
Identify and solve alignment problems by checking hardware tightness. Fix loose joints or missing parts by consulting the manual for precise solutions and torque guidelines.
5.1 Identifying and Solving Alignment Problems
Alignment issues often arise during assembly due to uneven surfaces or incorrect hardware placement. Start by ensuring all parts fit snugly and screws are tightened evenly. If drawers or doors misalign, check for proper hinge installation and adjust as needed. Use shims or spacers to level the furniture on uneven floors. Double-check the manual for specific alignment instructions, and if problems persist, consider consulting online resources or customer support for further guidance.
- Verify all components are correctly oriented.
- Use a level tool to ensure even placement.
- Adjust hinges or brackets as required.
5.2 Fixing Loose Joints or Missing Parts
If joints feel loose, tighten all screws firmly using the appropriate tools. For missing parts, refer to the inventory list and contact customer service for replacements. Ensure all hardware is correctly matched to avoid mismatches. If a joint remains unstable, apply wood glue or reinforcing brackets. Double-check the manual for specific instructions on handling such issues. Proper alignment and secure fastening are key to ensuring the furniture’s stability and longevity.
- Recheck the inventory list for missing components.
- Tighten all screws and bolts thoroughly.
- Contact customer support for replacement parts.
Maintenance and Care Tips
Regularly clean surfaces with a soft cloth and mild detergent. Avoid harsh chemicals to preserve the finish. Polish wood surfaces periodically to maintain their shine and protect the hardware from tarnishing.
6.1 Cleaning and Polishing the Furniture
For cleaning, use a soft, dry cloth to wipe down surfaces. Dampen with water only if necessary, avoiding harsh chemicals. Polish wood finishes with a high-quality furniture wax or oil. Apply in circular motions, then buff with a clean cloth for a glossy finish. Avoid abrasive materials that may scratch the surface. Regular polishing enhances durability and maintains the elegant appearance of your Beautiful by Drew furniture.

6.2 Protecting the Finish and Hardware
To maintain the beauty of your furniture, use coasters and placemats to prevent water marks and spills. Avoid placing hot objects directly on surfaces. For hardware, regularly inspect and tighten loose parts. Use a soft cloth to wipe down metal components, preventing dust buildup. Avoid harsh cleaners that may damage finishes. Apply furniture wax periodically to protect wood surfaces from drying out. These steps ensure long-lasting durability and preserve the elegant appearance of your Beautiful by Drew furniture.
Additional Resources and Support
Beautiful by Drew provides comprehensive online manuals and dedicated customer support for assembly assistance and troubleshooting. Visit their official website for detailed guides and contact information.
7.1 Accessing Online Manuals and Guides
Visit the official Beautiful by Drew website to access detailed assembly manuals and guides. Navigate to the “Support” or “Resources” section, where you can search for your specific product. Manuals are typically available as downloadable PDFs, ensuring easy access anytime. For added convenience, some products may include video tutorials or interactive guides. If you need further assistance, refer to the customer support contact information provided on the website for personalized help.
7.2 Contacting Customer Service for Assistance
If you encounter challenges during assembly, Beautiful by Drew Furniture offers dedicated customer service support. Visit their official website to find contact details, including phone numbers, email addresses, and live chat options. The support team is available to assist with troubleshooting, clarify instructions, and provide additional guidance. For faster assistance, have your product serial number and a detailed description of the issue ready when reaching out. Their team is committed to ensuring your assembly experience is smooth and stress-free.